Reviewed by Tara Sullivan · Updated July 2026 · 9 min read
A ponytail is the most honest style fine hair has — it gathers everything you own into one place and shows you exactly how much of it there is. The fix is to stop building it as one tail. Split the hair horizontally ear to ear, tie the bottom half, then tie the top half directly above it so the upper section drapes over and hides the lower elastic.
You get two overlapping layers reading as one tail, which is close to twice the visible width, and it costs you thirty seconds. Everything else — where the elastic sits, how the tail is textured, and what you tie it with — either adds to that or undoes it.
Below are 14 ponytails for fine and thin hair, from thirty-second everyday versions to occasion styles and options for bobs, plus the build method and the honest limits on wearing one daily. If your crown goes flat the moment you pull hair back, start with root volume for fine hair; if you would rather leave half of it down, our half-up styles for fine hair cover that route.
Chair-side note
I show the stacked ponytail to almost every fine-haired client who tells me her ponytail "looks like a paintbrush," and the reaction is always the same — she assumes there's a catch.
There isn't. Part the hair straight across from the top of one ear to the other, clip the top half up, and tie the bottom half where you want the finished tail to sit. Then drop the top half and tie it directly above, close enough that it falls over the first elastic.
What she was seeing before was one flat sheet of hair from the side. Now she's seeing two layers stacked front to back, and the eye reads that as thickness. The one thing to get right is the join: the top tail has to cover the lower elastic, not sit an inch above it, or you get two obvious ponytails instead of one full one.
SB
— Simone Baptiste, Senior Stylist
Why a ponytail exposes fine hair — and the three things that fix it
A ponytail removes every advantage fine hair has. Worn down, fine hair spreads across the shoulders and borrows width from the shape of your head; gathered into one point, it has nothing to spread across, so its actual circumference is on full display. Three specific things go wrong, and each has a direct fix. And if the stubby low ponytail is your particular complaint, it has a name and a fix — see updos for thin hair.
Placement flattens the crown. The higher the elastic, the more sharply every root on the top of your head is dragged backward. On dense hair that reads as sleek. On fine hair it strips out the small amount of crown height you had and shows the parting underneath.
Mid-height — roughly level with the tops of your ears, just above the bony ridge at the back of the skull — keeps some lift in front of the elastic while still letting the tail sit out from the head instead of lying flat against your neck.
The tail hangs as a single flat plane. Straight fine hair falls into a narrow taper that gets thinner toward the ends, which is why so many fine ponytails end in a point. Layering the tail — either by stacking two elastics, by teasing the underside, or by waving the hair before you gather it — replaces that taper with something that has front-to-back depth.
The hardware is fighting you. A bare rubber band grips fine hair at a single sharp edge, and a tie so large it needs four wraps is holding through tension alone. Fabric-covered elastics and spiral coils spread the pressure across a wider band.
It is a small change that decides whether taking the ponytail out leaves you with a dent and a handful of snapped ends. If you already have a band of shorter hairs at one height around your head, that's the elastic writing its signature — hair breakage on fine hair has the test that confirms it.
One clarification worth making, because the words get used interchangeably: fine is the diameter of each strand and thin is how many strands you have. A ponytail that feels narrow in your hand is telling you about density; a ponytail that goes limp and slippery within the hour is telling you about diameter.
Most of the tricks here help both, but they help for different reasons — the two-minute distinction is in our guide to telling fine hair from thin hair. If your hairline has already thinned from years of pulling, the cut matters as much as the tie — haircuts for a receding hairline.
Everyday ponytails that read fuller
These are the versions worth learning first — none takes more than two minutes, and each one adds visible width without any teasing. All four behave better on second-day hair, because freshly washed fine hair is slippery and slides down inside the elastic within the hour.
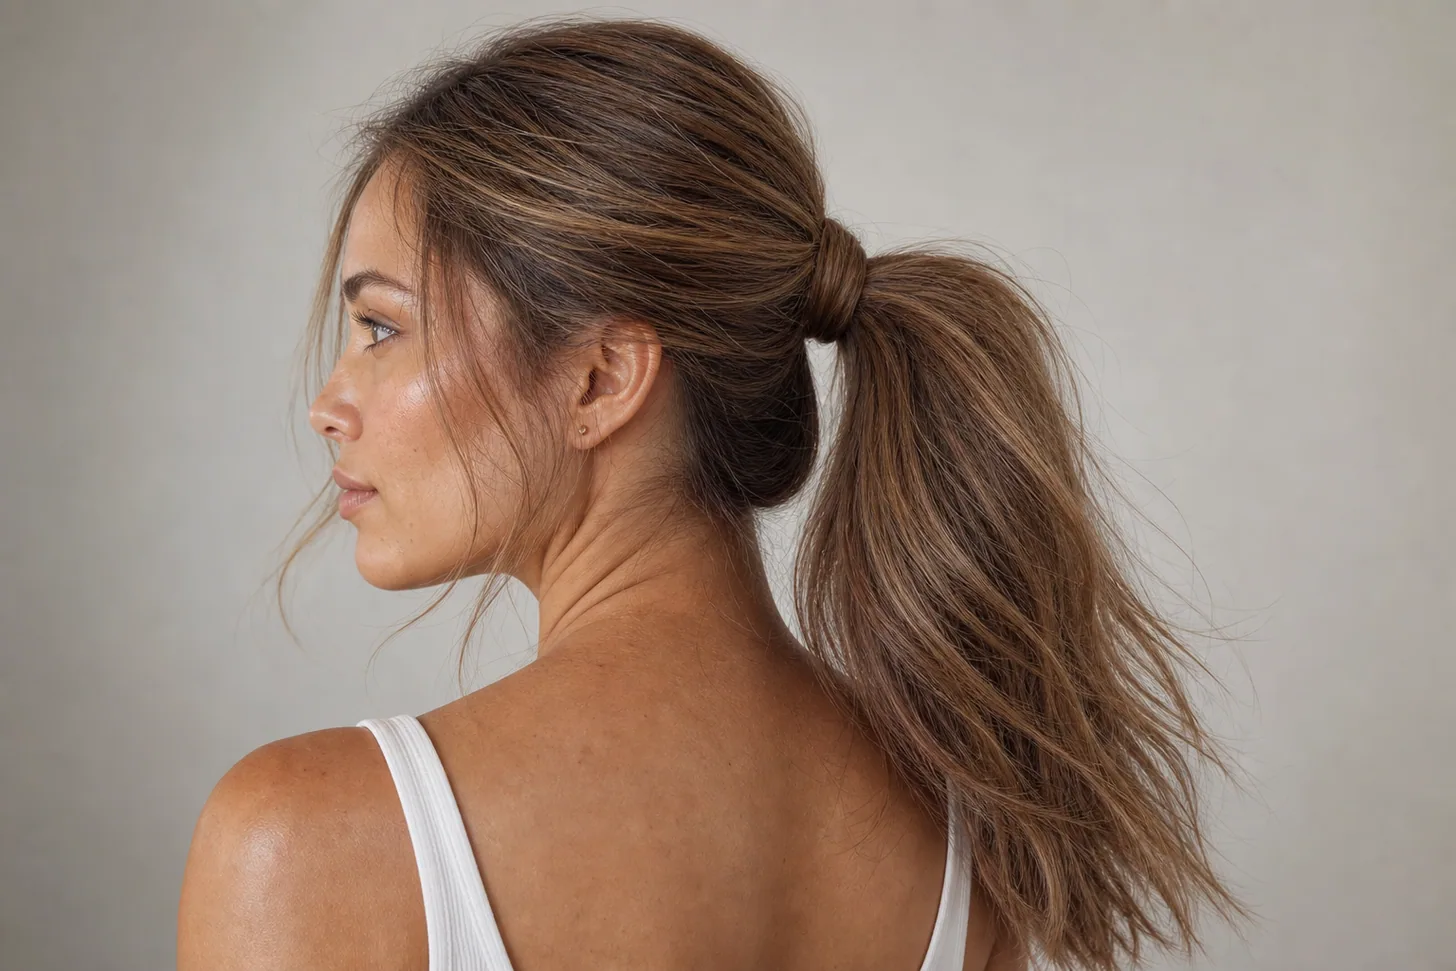
mid-height ponytail sitting level with the tops of the ears, soft crown height retained, on fine straight ash-blonde hair
1
The mid-height everyday ponytail
The default placement, and the one most fine hair should be using. Set the elastic level with the tops of your ears, just above the ridge at the back of the skull — high enough that the tail stands away from your neck, low enough that the crown isn't dragged flat. Tip your head back slightly as you gather so you don't pull the front too tight, and let the hair over your ears stay soft rather than combing it slick.
ponytail with a strand of hair wrapped around the base concealing the elastic, on fine mid-brown hair
2
The wrapped-strand ponytail
A twenty-second upgrade that makes a plain ponytail look considered. Take a pencil-width strand from underneath the tail, wrap it around the elastic two or three times, and pin the end upward into the base with a bobby pin. Hiding the elastic does something useful beyond neatness — the eye stops at a band of hair rather than at a hard line of black rubber, so the tail reads as continuous rather than pinched.
flipped or topsy-tail ponytail with the tail pulled through a gap above the elastic creating a twisted knot at the base, on fine straight dark-blonde hair
3
The flipped-through ponytail
Secure the ponytail slightly loosely, split the hair above the elastic into two, and pass the whole tail up through the gap from underneath. The hair folds over itself at the base and creates a small twisted knot of bulk exactly where a fine ponytail usually looks pinched. Push the elastic back up afterward to tighten. It reads as a technique rather than a plain tie, and it takes about ten seconds once you've done it twice.
low nape ponytail with soft crown height and loose face-framing pieces, on fine straight chestnut hair
4
The low ponytail with a soft crown
Low placement gets a bad reputation on fine hair, and unfairly — the problem is not the height, it's letting the top go flat on the way down. Build a little lift at the crown with your fingers before you gather, keep the sides soft over the ears, and set the elastic at the nape. Because there's no upward tension, this is the kindest version to wear on a long day, and it sits well under a collar or a hat.
Volume-first ponytails, built to look thicker
When width is the whole objective, the ponytail stops being a way to tie your hair back and becomes a construction job. Each of these adds depth in a different way — stacking, teasing, crown height, or curl — and they combine happily. Budget five minutes and a texture spray for grip.
stacked two-elastic ponytail shown from the side with the top layer draping over and hiding the lower elastic, on fine straight brown hair
5
The stacked two-elastic ponytail
The one to learn if you only learn one. Part horizontally from ear to ear, clip the top half away, and tie the bottom half where you want the finished tail. Release the top half, brush it back smoothly, and tie it directly above the first — close enough that it falls over and covers the lower elastic completely. Two overlapping layers read as one tail with real front-to-back depth. The only failure mode is spacing the elastics too far apart, which turns one full ponytail into two obvious thin ones.
ponytail with the underside of the tail lightly backcombed so the tail fans wide instead of tapering, on fine light-brown hair
6
The teased-tail ponytail
Tease the tail, not the roots. Hold the ponytail out horizontally, lift a section from the underside, and take two or three short backcombing strokes near the base. That builds a cushion inside the tail that holds it fanned instead of letting it collapse into a point. Smooth the top layer over so nothing shows, then spread the ends outward with your fingers rather than brushing them down. Take it out gently at the end of the day — slippery, conditioner-softened hair, working from the ends up.
bouffant ponytail with a rounded dome of height at the crown above a smooth top layer, on fine straight dark hair
7
The bouffant ponytail
Height at the front, width at the back. Backcomb the underside of a shallow crown section, smooth the top layer over the cushion with a bristle brush held almost flat, then gather everything into a mid-height tail without dragging the crown back down — hold the dome in place with one hand as you tie with the other. The silhouette this creates is the reason it survives every decade: a lifted top makes the whole head read fuller, even when the tail underneath hasn't changed.
ponytail with the tail curled into soft waves so it fans wider, on fine blonde hair
8
The curled-tail ponytail
Straight fine hair falls in a narrow taper; waved fine hair occupies noticeably more space. Curl the lengths before you gather — or curl the tail afterward in two or three sections — using the lowest heat setting that takes, and let each section cool completely in your hand before you release it. Cooling is what sets the shape on fine hair, and it's the step everyone skips; the full mechanism is in how to curl fine hair so it holds.
Dressed-up ponytails for occasions
For the biggest of those, the constraint is not the style but the schedule — wedding hair for fine hair covers the trial run, the timing and what holds through a long day. The wrapped low version is the one I build most often on a bridesmaid with twenty minutes in the chair — see bridesmaid hairstyles for fine and thin hair.
For anything photographed, the brief changes: the same width, but with a cleaner finish and something deliberate happening at the base or down the tail. All three below want hair that was washed the day before, and all three benefit from a flexible-hold spray rather than a stiff one — a freeze-hold finish snaps fine hair flat as it sets.
polished low ponytail with a deep side part and smooth sides, soft volume kept at the crown, on fine dark-brown hair
9
The polished low ponytail with a deep side part
A deep side part is quietly the most flattering thing fine hair can do, because sweeping hair across the head builds height at the parting instead of splitting the crown down the middle where the scalp shows. Keep the sides smooth but not slicked wet, take the tail low, and hide the elastic under a wrapped strand. Anything glossy or gelled at the roots will cost you the height you just built, so keep the shine on the lengths.
bubble ponytail with four evenly spaced elastics down the tail and each segment fanned outward, on fine mid-length brown hair
10
The bubble ponytail
Space three or four thin elastics down the tail and gently pull each segment outward until it rounds. This is unusually effective on fine hair because every bubble is fanned to a width the hair could never hold on its own — the style manufactures volume rather than displaying it. Keep the bubbles small and close together; widely spaced ones expose how little hair is travelling between them.
ponytail tied with a folded silk ribbon at the base, soft waves in the tail, on fine light-brown hair
11
The ribbon-tied ponytail
A ribbon or narrow scarf adds visual bulk exactly where a fine ponytail is narrowest, and it does it without tension. Secure with a small elastic first — a ribbon alone loosens — then tie the ribbon over it and let the tails hang. Choose a fabric with some body; a limp ribbon lies flat and adds nothing. This is also the gentlest option for a long event, since the bow takes some of the visual job the elastic would otherwise have to do with grip. A barrette placed over the elastic hides a thin-looking base and adds a finished edge; our barrette picks for fine hair covers the sizes that work at low density.
Short, mid-length and low-tension options
Short hair doesn't rule out a ponytail — it changes the size of everything and moves the anchor down. The last entry here is the one to recognize and avoid, at any length.
short stub ponytail at the nape on a fine chin-length bob with the shorter side pieces pinned back, on fine silver-brown hair
12
The bob stub ponytail
On chin-to-jaw length, gather what will reach at the nape with a mini elastic and stop fighting the rest. Pin the shorter side pieces back with two crossed bobby pins instead of dragging them into the tail, which is what creates those bumps along the sides. The stub itself is meant to be short — it reads as intentional when the sides are pinned neatly and messy when they're half-escaped.
low ponytail held in a small claw clip instead of an elastic, soft and untensioned, on fine shoulder-length hair
13
The claw-clip ponytail
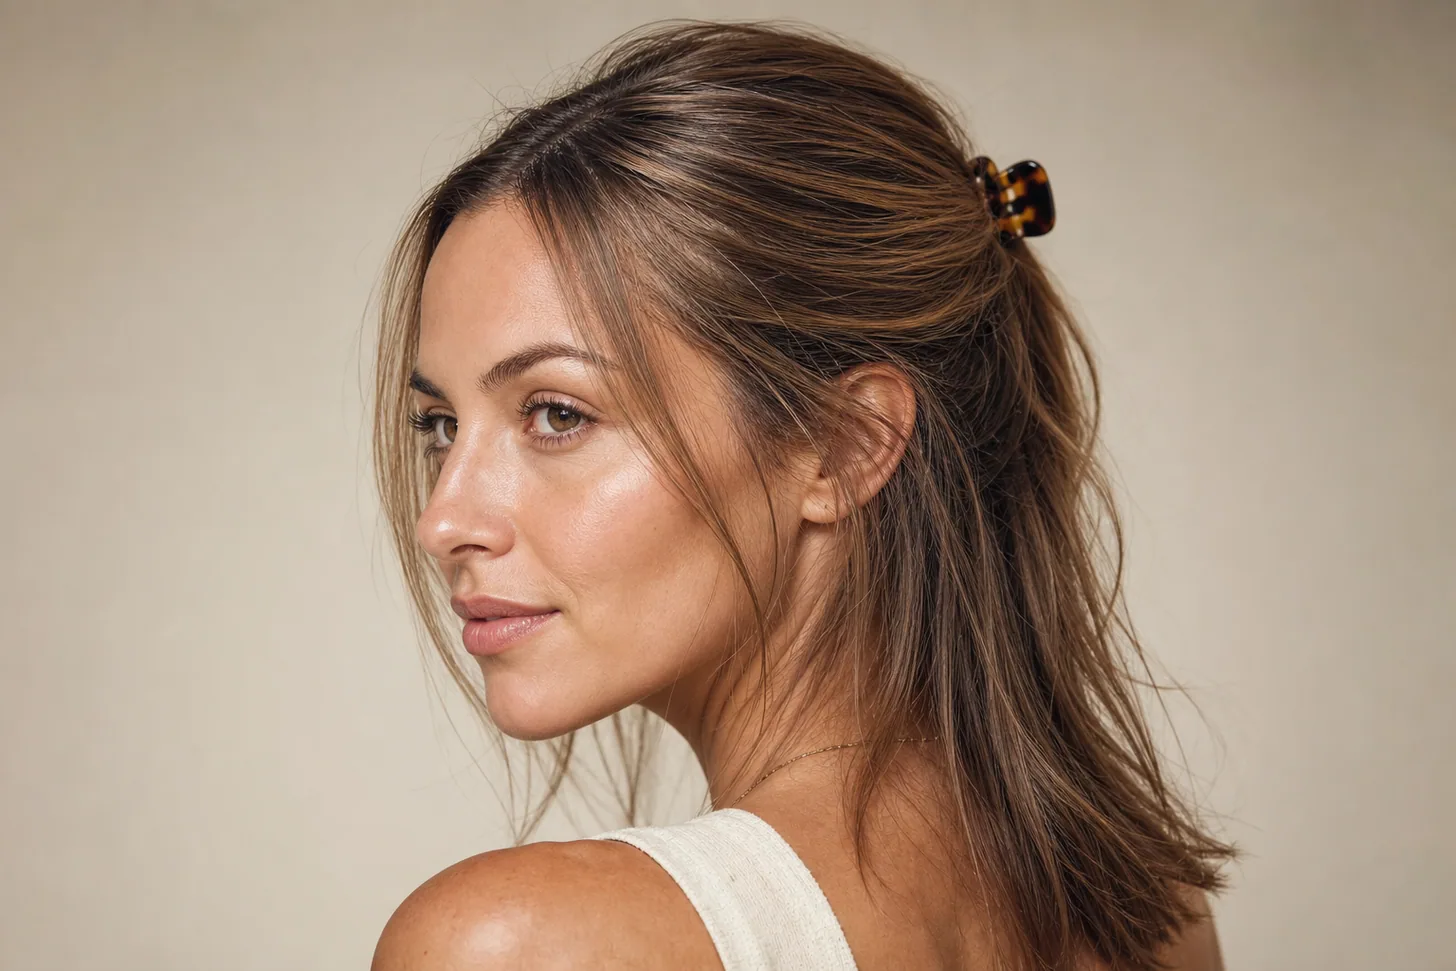
The lowest-tension way to get your hair off your neck. Gather it loosely at the nape and close a small or medium claw clip over the base — no elastic, no dent, nothing pulling on the hairline. Size matters more than anything: an oversized clip can't get its teeth to meet on a fine section, loses tension, and travels down within the hour. Ridged or rubberized teeth grip fine strands far better than smooth polished plastic.
very high tightly slicked ponytail shown as the look to avoid, flat crown and visible scalp at the temples, on fine hair
14
The very high, very tight slick-back — the one to skip
Worth naming so you can spot what's going wrong. A high slicked ponytail does three unhelpful things to fine hair at once: it flattens the crown into the scalp, it pulls the fragile hairline at the temples where fine hair is finest, and wet-look product on the roots removes any chance of lift. If your instinct when a ponytail looks thin is to pull it tighter and smooth it flatter, that's the trap — tension makes it narrower, not fuller. Go mid-height, leave the sides soft, and build width in the tail instead.
How to build a fuller-looking ponytail, step by step
This is the stacked version, which is the one worth defaulting to. Five minutes the first time, under two once it's familiar.
Start on second-day hair, or fake it. Freshly washed fine hair is slick and slides out of everything. On clean hair, mist a texture spray or a little dry shampoo through the roots and mid-lengths and work it in with your fingertips before you gather.
Add crown height first. Backcomb the underside of a shallow crown section, or lift the roots with a round brush and a blast of cool air. Do this before anything is tied — you cannot add it once the elastic is in.
Part horizontally, ear to ear. Run the comb straight across the back of your head at the level of your ear tops and clip everything above it out of the way.
Tie the bottom half. Gather the lower section where you want the finished ponytail to sit and secure it with a fabric-covered elastic. This tail will be hidden, so it doesn't need to be perfect.
Tie the top half directly above it. Release the clipped section, brush it back over the top of the first tail, and secure it so it drapes over and completely covers the lower elastic. Check from the side: you should see one tail, not two.
Fan the tail. Tease the underside of the tail near the base with two or three short strokes if you want more width, then separate the ends outward with your fingers instead of brushing them into a point.
Hide the elastic. Wrap a pencil-width strand from underneath around the visible elastic and pin the end up into the base.
Set it lightly. A flexible-hold spray, misted from ten inches away, over the crown and the tail. Let it dry untouched. A stiff freeze-hold spray collapses fine hair as it sets, which undoes the whole build.
Chair-side note
The hair ties are worth two minutes of your attention, because they cause damage that looks like thinning and isn't. I see fine-haired clients with a distinct band of short broken pieces at the crown, always in the same spot, always from a bare rubber or metal-crimped elastic worn in the same place daily. Fine strands are thinner in diameter, so a sharp edge under tension cuts them where a coarser hair would survive it.
Switch to a fabric-covered elastic or a spiral coil, and buy the smallest size that holds in two wraps — if you're winding it four times, the tie is too big for your density and the grip is coming entirely from tension. Then move the placement around from day to day. Same ponytail, same spot, every single day is the pattern that causes trouble, not the ponytail itself.
SB
— Simone Baptiste, Senior Stylist
When a ponytail isn't the right call
You'd be wearing the same tight ponytail every day, in the same spot. Sustained daily pull on the same roots and the same hairline is the thing to avoid. Vary the height, keep it loose enough to slide a finger under the base, and alternate with clips, half-ups, and hair worn down.
Your hairline at the temples is noticeably sparser than the rest. A ponytail pulls hardest exactly there. Switch to a low claw clip or a loose braid, keep the front pieces out entirely, and read our guide to coverage for thinning on top before making a pulled-back style your default.
Your scalp shows clearly along the part when your hair is dry. Pulling everything back opens the parting rather than covering it. A deep side part, soft sides, and a mid or low placement all help — a high, slick ponytail is the least forgiving option.
Your tail is shorter than about four inches. There isn't enough length to layer or fan, so the stacking trick has nothing to work with. A low bun, a claw clip, or pinned-back sides will look more deliberate — our buns for fine hair that hold covers the short-length versions.
You get headaches from tied-back styles. That's tension telling you something. A claw clip or a ribbon-tied low ponytail holds without the constant upward pull, and moving the anchor lower on the head reduces it further.
FAQ
Build the tail in two layers instead of one. Split the hair horizontally from ear to ear, secure the lower half into a ponytail, then gather the top half and secure it directly above the first elastic so the upper section falls over the lower one. The tail reads close to twice as wide because you are seeing two overlapping layers rather than one flat sheet, and the join is hidden underneath. Add a light backcomb through the underside of the tail, spread the ends outward with your fingers rather than smoothing them down, and finish with a texture spray so the hair stays fanned instead of collapsing back into a point.
Mid-height suits fine hair best — roughly level with the top of your ears, sitting just above the bony ridge at the back of the skull. That placement keeps some crown height in front of the elastic and lets the tail sit out from the head rather than lying against it. A very high ponytail drags every root backward and flattens the crown you were trying to lift, and a very low one at the nape lets a fine tail lie flat against your neck, where it reads at its thinnest. If you want the look of a high ponytail, build crown volume first and then place the elastic only slightly higher than mid.
It is the single most effective way to make a fine ponytail look thicker without adding hair. Part the hair horizontally from ear to ear, clip the top half out of the way, and tie the bottom half into a ponytail. Then release the top half and tie it into a second ponytail directly above the first, so the top tail drapes over and completely hides the lower elastic. From the front and side you see two stacked layers of hair reading as one much fuller tail. It takes about thirty seconds longer than a standard ponytail and works on any length that can be gathered twice.
A fabric-covered elastic or a spiral coil tie, not a bare rubber band. Fine strands are thinner in diameter and snap more readily under a sharp edge, and bare rubber or a metal-crimped elastic grabs the hair at a single point where it can cut. Fabric-covered elastics spread the pressure, and spiral coils distribute it further and leave less of a dent, which matters if you take the ponytail down and want to wear your hair loose afterward. Choose the smallest size that holds without needing four wraps — a tie that has to be wound repeatedly is too big for your density and is doing the damage through sheer tension.
You can, but vary it. The risk with fine hair is not the ponytail itself, it is wearing the same tight ponytail in the same spot every single day, which puts sustained pull on the same roots and the same fragile hairline. Move the placement around — mid one day, low the next — keep it loose enough to slide a finger under at the base, and use a fabric-covered tie rather than a bare elastic. If you are noticing more scalp along your part or thinning at the temples, ease off tight styles altogether and read our guide on coverage for thinning on top before you make a ponytail your daily default.
Go low and small, and let the pieces that will not reach stay out. On a bob, gather what you can at the nape with a mini elastic and pin the shorter sides back with two crossed bobby pins rather than fighting them into the tail. On shoulder-length hair, a mid-height ponytail is usually achievable but will look better if you curl or wave the tail first, since a short fine tail hangs in a point when it is left poker straight. A claw clip is often the better tool at these lengths — it holds a small amount of hair without the tension an elastic needs.
Yes, but tease the tail rather than the roots, and only on the underside. Hold the tail out horizontally, take a section from underneath, and make two or three short backcombing strokes near the base — that builds a cushion inside the tail that props it up and keeps it fanned. Smooth the top layer over it so nothing shows. Teasing the roots before you gather only makes the hair harder to secure smoothly and adds bulk where the elastic needs to close. Brush the tease out gently with conditioner-slick hair at the end of the day rather than yanking it through dry.
Eleven years behind the chair, specializing in fine-hair texture and styles that survive past lunchtime. Simone teaches the stacked ponytail to every client who says her ponytail looks like a paintbrush.
Results vary with hair type, density, and growth patterns. This guide is educational and not a substitute for an in-person consultation with a licensed stylist.
Hairstyle images in this guide are AI-generated illustrations, not photos of real clients or results. See our image policy.
Get the good hair intel
One honest, stylist-written guide in your inbox each week. No hype.

 SB
SB