Reviewed by Tara Sullivan · Updated July 2026 · 9 min read
Almost every braid tutorial online is demonstrated on dense hair, and the technique that looks effortless there is exactly what makes a fine braid look thin. A braid reads fuller on fine hair when it has grip, low tension, and width: style on second-day hair or a texture spray so the sections don't slide, braid loosely enough that the plait sits off the head instead of pressed flat to the scalp, then pancake it — gently tug the outer edge of every completed loop, which can nearly double the apparent width of the braid.
Pulling tighter does the opposite of what it feels like it should: tension flattens the plait and lets the scalp show through, which reads thinner, not neater. Below are 14 braids that hold and look full on fine, low-density hair — everyday plaits, crown and hairline styles, braided updos, and second-day options — each with how to actually execute it. If you want the pinning technique that keeps any of them anchored, our guide to updos for fine hair that hold is the companion piece.
Chair-side note
The most common thing I fix on a fine-haired client who says "braids don't work on me" is her grip on the sections. She's holding them like she's tightening a shoelace — pulling each pass firm against the scalp, because that's what looks tidy in the mirror while she's doing it. Then she stands up and the braid is a thin rope with a pink stripe of scalp on either side.
I have her redo it with her hands an inch further from her head, so the plait forms in the air and rests on the hair rather than being pulled into it. Same braid, same hair, and it comes out twice as wide. The instinct to pull tight is the single thing costing you fullness.
SB
— Simone Baptiste, Senior Stylist
The three things that make a braid look fuller on fine hair
Grip comes from texture, not tension. Fine, freshly washed strands are smooth and slippery, so the sections slide against each other while you work and the finished braid loosens within the hour. The fix is friction, not force: braid on second-day hair, or mist a texture spray through the mid-lengths and a little dry shampoo at the roots and rough it up with your fingers first. Tightening a slippery braid does not make it stay — it just flattens it.
Low tension is what keeps the braid full. A braid pulled hard sits pressed against the head, its sections compressed into a narrow rope, and on low-density hair the scalp shows in the gaps between passes. Braided loosely, the plait stands off the head, catches light on the top of each loop, and hides the scalp underneath. Keep your hands about an inch away from the head as you cross sections, and let the braid form in the air.
Pancaking is the fullness trick that does the most work. Once the braid is secured, hold the elastic in one hand and gently pull the outer edge of each completed loop outward, working from the ends up toward the crown. Each loop flattens and widens, and the braid goes from a pencil-width rope to something soft and substantial.
It only works if you braided loosely to begin with — a tight braid has no slack to give. Mist the finished braid so the widened loops hold their shape, and if you want more root height under it first, the prep in our volume guide stacks well with all of this.
Everyday braids that read thicker
These are the four to learn first — the ones you can do on yourself, in a mirror, in under five minutes. All of them are built loose and finished wide, and every one of them is better on day-two hair than on freshly washed hair. Start here before attempting anything that involves two hands behind your head.
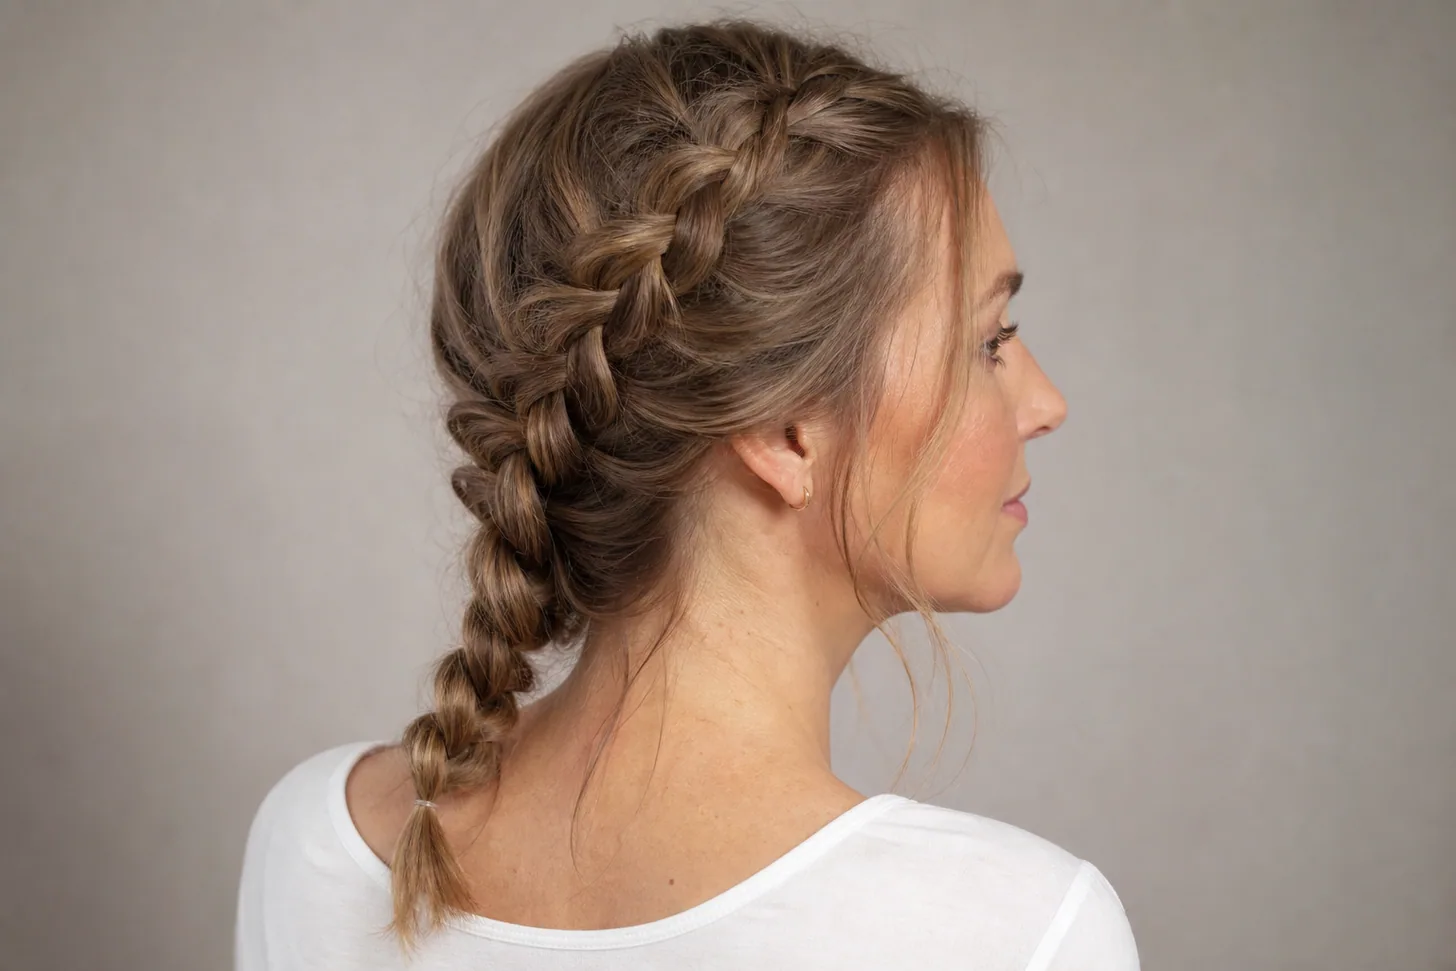
loose pancaked Dutch braid down the back, wide soft loops standing off the scalp, full-looking on fine blonde hair
1
The Pancaked Dutch Braid
The single most useful braid for fine hair. Cross the outer sections over the middle one rather than under, so the plait sits on top of the hair instead of tucking beneath it — that alone makes it read thicker than a French braid. Braid with your hands held away from your head, secure with a small elastic, then pull the outer edge of every loop outward from the ends upward. Finish with a light mist so the widened loops stay open.
loose side braid falling over one shoulder, soft face-framing pieces pulled out, on fine light-brown hair
2
The Loose Side Braid
Everything gathered low over one shoulder and plaited in a simple three-strand, deliberately slack. Because it hangs forward rather than lying against your back, it's the easiest braid to widen — you can see exactly what you're pulling. Leave a couple of soft pieces loose at the temples before you start so the front doesn't look scraped. Best for anyone who wants a braid but not a hairstyle: it takes about two minutes and forgives an uneven part.
fishtail braid with fine woven texture and widened sections, worn to the side on fine ash-blonde hair
3
The Fishtail Braid
Two sections, and you cross a thin piece from the outside of one over to the inside of the other, alternating. The fine woven pattern it creates is flattering on low-density hair because the eye reads texture rather than volume — there's no fat loop to look sparse. It takes longer than a three-strand and it needs grip to stay neat, so this is a second-day style. Widen it gently once it's tied; the weave loosens easily, so a light hand here.
boho half-braid, one thin plait from the temple pinned back over loose waves, fullness at the crown, on fine hair
4
The Boho Half-Braid
A single small plait taken from one temple and pinned back under the loose hair, with the rest left down. It gives you the detail of a braid without asking your whole head of hair to fill one. This is the most forgiving option on the list for genuinely low density, because the down hair does the covering while the braid does the interest. Pair it with the volume-first approach in our half-up styles for fine hair.
Braids that build width at the crown & hairline
Braids that start at the hairline are the ones that flatter fine hair most, because a Dutch braid crossing over the top of the hair adds visible height exactly where fine hair falls flattest. They are also the ones where tension does the most damage, so this is the section to braid gently. If it aches, it's too tight — full stop.
Dutch crown braid arcing across the top of the head, raised plait adding height, on fine straight brown hair
5
The Dutch Crown Braid
A Dutch braid worked in an arc across the top of the head from one temple toward the opposite ear. Because the plait crosses over the hair, it sits raised and adds real height at the crown rather than pressing the roots down. Feed in small sections as you go and stop feeding once you pass the ear, then pin the tail underneath. Pancake only the outer edge of the braid so it widens away from the face and the arc stays clean.
milkmaid halo braid wrapped around the head, widened plaits, on fine mid-length light hair
6
The Halo (Milkmaid) Braid
Two braids, one on each side, crossed over the top of the head and pinned. Fine hair usually produces two thin plaits here, and untouched they read like a headband made of string — so pancaking is not optional. Widen both fully before you pin, then anchor each end under the opposite braid with crossed bobby pins. Mid-length hair is the sweet spot; very long fine hair makes the wrap bulky at the back of the head rather than fuller at the top.
double Dutch braids running from the hairline to the nape, both widened for fullness, on fine dark hair
7
The Double Dutch Braids
Two Dutch braids running front to back on either side of a center part. Splitting fine hair in half means each braid has half the material, so this only works if you widen both hard once they're tied — and if you keep the part soft rather than razor-clean, since a sharp part on low density shows a stripe of scalp. Braid these especially loosely: two rows of tension at the hairline is twice the pull on the most fragile hair you have.
thin braided headband running from ear to ear over the front hairline, soft volume behind it, on fine hair
8
The Braided Headband
A slim braid taken from behind one ear, run across the front of the head like an Alice band, and pinned behind the opposite ear. Its real job on fine hair is disguise: it covers the front hairline and hides a widening part while the hair behind it stays loose and full. Take the braid from a section behind the ear, not from the hairline itself, so you aren't pulling on the most delicate strands. Two crossed pins at each end hold it all day.
Braided updos & low styles that hold
These are the ones that get worn to occasions, and an occasion adds a timing problem the styles themselves do not — wedding hair for fine hair covers the trial run and the schedule, and bridesmaid hair for fine hair covers the version where you get neither.
Braiding before you pin solves the classic fine-hair updo problem — a loose ponytail has nothing for pins to bite into, but a braid gives them structure to grip. These three all use that principle, and all three are what I reach for on a fine-haired client who needs a style to survive a long day.
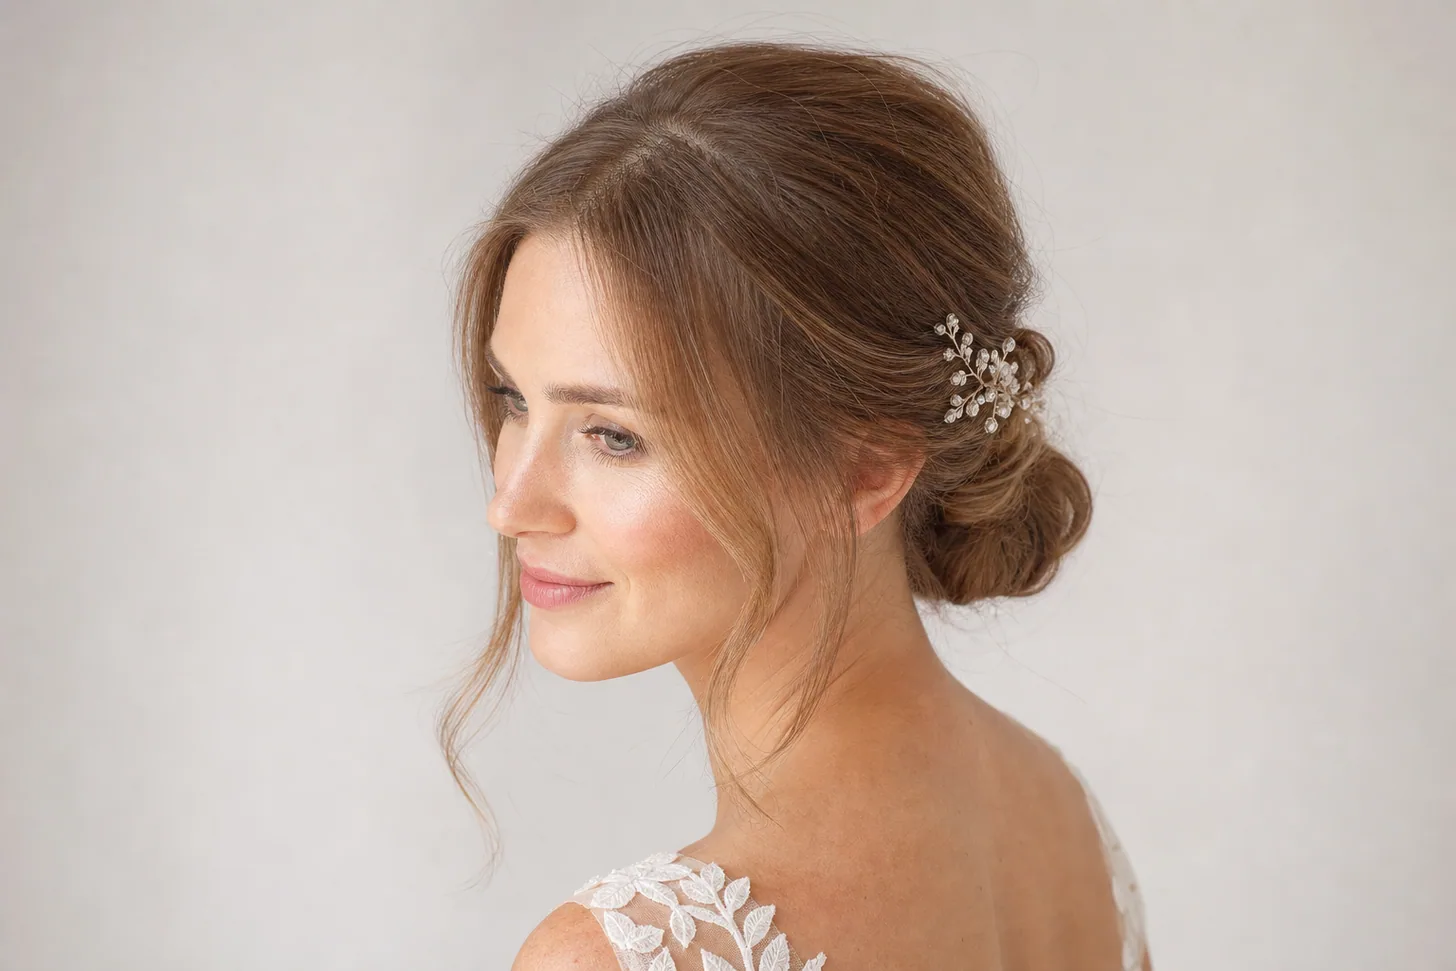
braided low bun coiled at the nape, wide soft braid wrapped around, on fine light-brown hair
9
The Braided Low Bun
Braid the ponytail first, pancake it while it hangs free, then coil the widened braid around its own base and pin. A pancaked braid coils into a bun with real diameter, where a loose fine ponytail coils into a knot the size of a walnut. Pin into the braid itself rather than into the surrounding hair — that's what makes it hold. Ten to fifteen minutes including prep, and it survives a full workday.
soft braided chignon at the nape with tucked ends and face-framing pieces, on fine straight hair
10
The Braided Chignon
Softer and lower than the bun: braid loosely, widen the plait, then fold it up under itself at the nape and pin the fold rather than coiling it. The folded shape reads wide and flat instead of round, which suits fine hair because it covers more surface with less material. Leave a piece down at each temple. This is the one to wear when you want the style to look unplanned rather than set.
twisted rope braid, two twisted strands wound together into a thick soft rope, on fine blonde hair
11
The Twisted Rope Braid
Not a braid at all, technically. Split a ponytail in two, twist each half tightly in the same direction, then wind the two around each other in the opposite direction and tie. The counter-twist is what locks it, so it holds on slippery hair better than a three-strand and takes about ninety seconds. It doesn't pancake — instead, gently ease the rope apart along its length to bulk it out. A good first braid if plaiting behind your head defeats you.
Braids for second-day and lived-in hair
Day-two hair is not the compromise here, it's the ideal — the natural oil and yesterday's product give fine strands the friction a braid needs. These are the styles that get better as the wash cycle goes on, and the last one is the braid to leave alone entirely. For everything else you can do on unwashed fine hair, see our guide to reviving second-day fine hair.
messy lived-in braid with pieces escaping around the face, wide loose plait, on fine day-two hair
12
The Messy Day-Two Braid
Deliberately imperfect, and the most flattering thing you can do to fine hair on day two. Braid without brushing first, let pieces escape at the temples and the nape, and widen the plait generously. The looseness is doing real work: escaped strands blur the outline of the braid so the eye can't measure how thick it actually is. Add dry shampoo at the roots before you start, both for lift and for grip.
Dutch braid-back covering grown-out roots along the part and hairline, worn on fine unwashed hair
13
The Braid-Back for Grown-Out Roots
A Dutch braid worked back from the front hairline covers the part line and the first inch of regrowth better than any powder or spray, because it physically redirects the hair across the demarcation. Braid it on damp-ish hair before bed and it sets overnight — sleep on it, and in the morning you either wear the braid as it is or take it out for soft waves you didn't heat-style. Either way it buys you a day or two before a color appointment or a wash.
very tight sleek scraped-back braid pulled flat to the scalp showing the part line, shown as the look to avoid on fine hair
14
The Tight Scraped-Back Braid — the one to skip
Worth including so you know what you're avoiding. The sleek, wet-look, pulled-flat braid is everywhere right now, and it's the least forgiving style on this list for fine hair: gel-slicked strands cling to the scalp, the plait compresses to a narrow rope, and every gap between passes shows skin. It also puts the hardest pull on your hairline of anything here. If you love the look, take the tension out — smooth the front with a brush and a light cream instead of gel, and keep the braid itself loose and widened.
How to prep fine hair so a braid holds all day
The braid holds or fails before you cross the first section. Work through these in order and almost any style above will still be there at 6pm.
1. Braid on day-two hair, or fake it. If your hair is freshly washed, mist a texture spray through the mid-lengths and lengths — not a sea-salt spray, which dries fine hair out for the same effect — and work a little dry shampoo into the roots. Rough it up with your fingers and give it a minute to grab. You want the hair to feel slightly matte rather than silky.
2. Build root lift first. Anything you want at the crown has to be there before you braid, because braiding can't add it afterward. Flip your head and blast the roots with cool air, or set two velcro rollers at the crown while you do the rest of your face. The heatless volume methods work well here since you're not heat-styling the lengths anyway.
3. Keep your hands off the scalp. Braid with your hands about an inch away from your head so the plait forms in the air. Tight passes flatten the braid and expose the scalp; slack passes give you material to widen later.
4. Use a small, hair-colored elastic. A thick elastic swallows a fine ponytail and the tail below it looks stringy by comparison. A thin one that matches your color disappears and keeps the end in proportion.
5. Pancake, from the bottom up. Hold the elastic firmly in one hand. With the other, pinch the outer edge of the lowest loop and pull it outward about a quarter-inch — small pulls, many of them. Work upward loop by loop on both sides. If the whole braid starts sliding, you're pulling the loop rather than its edge. Stop when the width looks slightly excessive; it settles.
6. Pin the base and taper the end. Cross two bobby pins at the top of the braid where it meets the scalp so the plait can't slide down.
Then deal with the tail: fine hair ends in a wisp, so either stop braiding an inch early and tuck the end under, or wrap a thin strand around the elastic and pin it. Finish with a flexible-hold spray held at arm's length, not a stiff one — hard spray glues the widened loops shut.
Chair-side note
A test I give clients before they leave: braid it, then look at the back in a hand mirror and ask whether you can see scalp through the braid — not around it, through the gaps between the passes. If you can, the answer is never "add more hair," it's "redo it looser." I've watched people spend money on clip-in wefts to fix a problem that was tension the whole time.
The other half of the test is comfort. A fine-hair braid should feel like nothing. If you can feel it pulling at the temples while you're doing it, your hairline will feel it all day, and that's the kind of repeated pull worth taking seriously over months and years. Braiding close to the front edge is where traction shows first; if yours already has, see cuts for a receding hairline on fine hair.
SB
— Simone Baptiste, Senior Stylist
When braiding fine hair isn't the answer
You braid tightly at the hairline most days. Repeated pulling at the front and temples strains the follicles over time and is associated with traction hair loss. Rotate styles, braid loosely, and take the pull off the hairline. If your hairline is already receding or thinning, read our honest guide to thinning on top and speak to a doctor rather than styling around it. For braids and twists installed in sections rather than plaited from loose hair, the size of the section is the variable that decides the risk — that sizing is covered in styles for fine coily hair.
Your hair is shorter than about chin length. There isn't enough length for a plait to hold, and half of it escapes within minutes. A twisted, pinned-back section or a half-up gives you the same detail with hair that will actually stay put.
You've just washed and blow-dried it smooth. Slippery is the enemy — the braid will slide loose no matter how you tie it. Either wait a day, or spend two minutes putting texture back in before you start.
Scalp shows clearly along your part when the hair is down. A braid running along that part draws the eye straight to it. Choose a style that crosses the part instead — a braided headband, a diagonal Dutch braid, or a soft side braid on a deep part.
FAQ
Yes, but the braid has to be built differently than it is on thick hair. A loose, pancaked braid on fine hair reads full and soft; a tight, tension-pulled braid flattens against the scalp and lets the scalp show through the plait, which reads thinner rather than neater. The two things that decide it are grip and width. Style on second-day hair or mist texture spray through the lengths first, braid loosely enough that the plait sits off the head, then gently tug the outer edge of each loop to widen it before you set the ends.
Pancake it. Once the braid is finished and secured, hold the elastic in one hand and gently pull the outer edge of each completed loop outward, working from the ends up toward the crown. That flattens and widens every section and can nearly double the apparent width of a fine braid. Two things make pancaking hold: braid loosely to begin with, so there is slack to pull from, and mist a flexible-hold or texture spray over the finished braid so the widened loops stay open instead of sliding back.
Dutch, in most cases. A French braid crosses the outer sections under the middle one, so the plait tucks beneath the hair and lies flat against the head. A Dutch braid is the inside-out version: the sections cross over, so the plait sits on top of the hair and stands proud of the scalp. On fine hair that raised braid reads visibly thicker, and it gives you something to grip and pancake. A French braid still works; it just needs more widening to reach the same fullness.
Second-day hair, almost always. Freshly washed fine hair is smooth and slippery, so the sections slide against each other while you braid and the whole plait works its way loose within an hour. A day of natural oil gives the strands grip without looking greasy. If you have to braid on clean hair, build the grip back first: mist texture spray through the mid-lengths and a little dry shampoo at the roots, rough it up with your fingers, and let it sit a minute before you start.
Grip and anchoring, not tension. Prep with texture spray or braid on day-two hair, then pin the base, crossing one or two bobby pins at the top of the braid where it meets the scalp so the whole plait cannot slide down. Use a small, hair-colored elastic rather than a thick one, which swallows a fine tail and leaves it looking stringy. Leave the last inch un-braided and tuck it under, or wrap a strand over the elastic. Finish with a flexible-hold spray, not a stiff one.
Braiding itself is gentle; the risk comes from tension. Braids that pull hard at the hairline, worn tight and worn often, put steady strain on the follicles, and that kind of repeated pulling is associated with traction hair loss along the front and temples. Fine hair gives you no reason to braid tight anyway, since loose braids read fuller. If a braid aches, stings, or leaves small bumps at the hairline, it is too tight. If your hairline itself is receding or thinning, speak to a doctor.
Eleven years behind the chair, specializing in updos and fine-hair texture. Simone braids every fine-haired client loosely and widens afterward, because tension is what makes a fine braid look thin in the first place.
Results vary with hair type, density, and growth patterns. This guide is educational and not a substitute for an in-person consultation with a licensed stylist.
Hairstyle images in this guide are AI-generated illustrations, not photos of real clients or results. See our image policy.
Get the good hair intel
One honest, stylist-written guide in your inbox each week. No hype.

 SB
SB