Reviewed by Tara Sullivan · Updated July 2026 · 10 min read
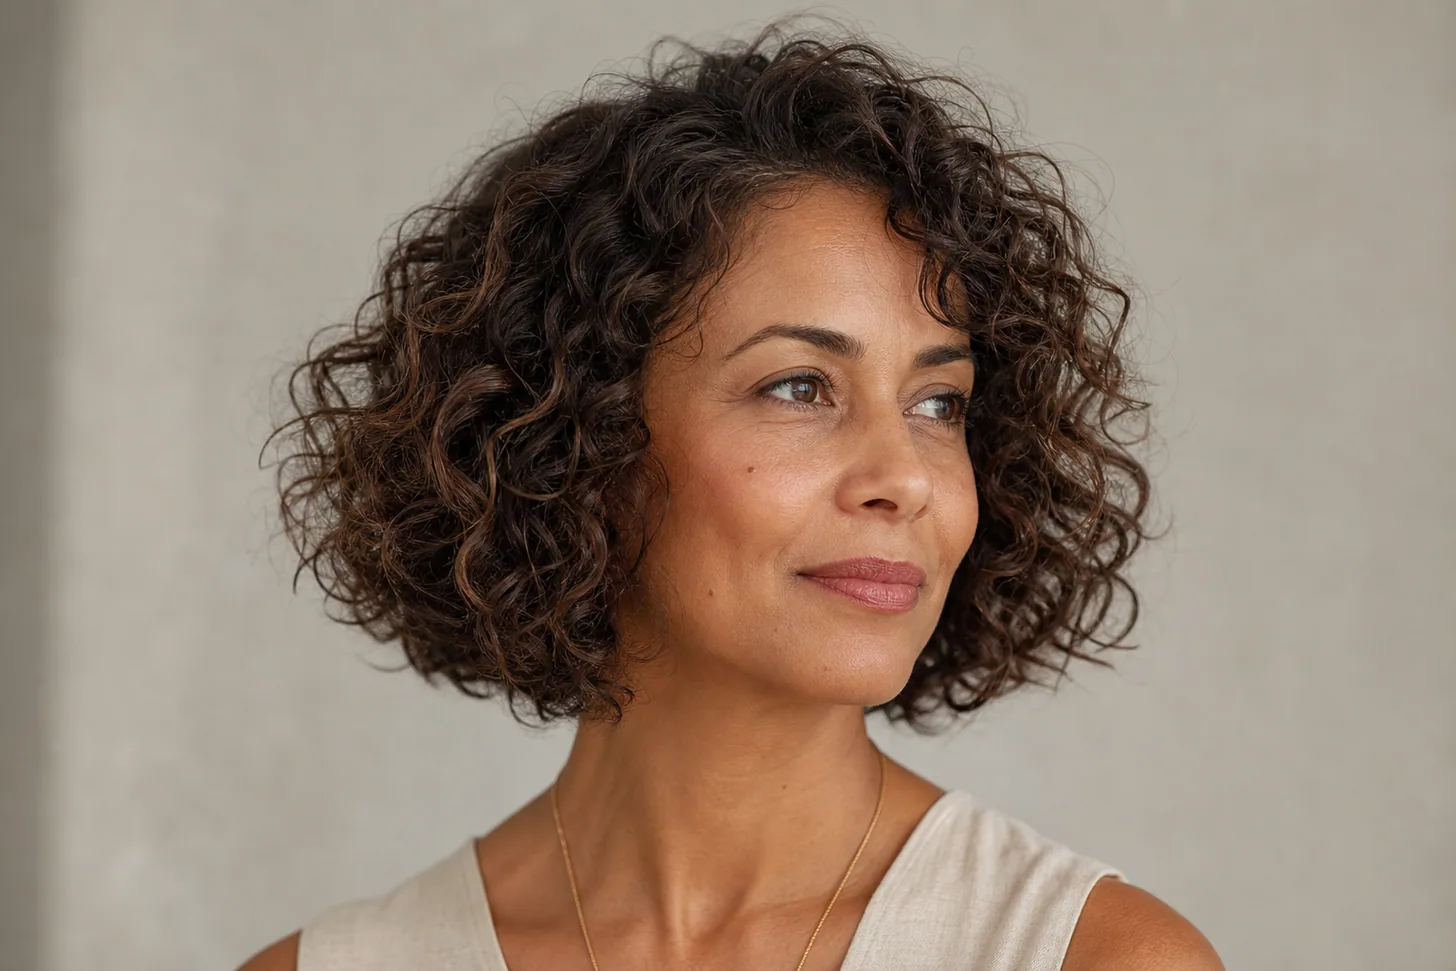
Almost every curly-hair rule you have read was written for thick, dense curls — and on low-density curls, half of it is actively wrong. Curls with less hair on the head read fullest between the chin and the collarbone, cut dry and curl by curl, with a solid perimeter left intact and a few short layers placed at the crown for lift: no thinning shears, no razor, no heavy internal layering.
Those three techniques are standard on dense curls because the job there is removing bulk. On hair that has no bulk to spare, they strip the density that was making the shape look full in the first place. Below are 16 cuts for thin curly hair — short crops, bobs and lobs, longer layered shapes, and fringe options — plus how to style them so the volume holds past noon, and the words to say in the chair.
If your texture is looser than a defined curl, our gallery of cuts for fine, wavy hair is the closer fit; and if you're not certain whether you're working with fine strands or low density, settle that first, because it changes the cut.
Chair-side note
The clients I see in the most distress are the ones who walked into a curl specialist with fine, sparse curls and walked out having been thinned. It's an easy mistake to make: curls occupy a lot of visual space, so the hair looks like there's plenty of it, and a stylist trained on dense curls reaches for the thinning shears out of habit.
Then it dries and the ends have gone transparent. Before I pick up any shears now, I part the hair in three or four places and look at the scalp. Curl pattern tells me how to cut. Density tells me how much I'm allowed to take.
SB
— Simone Baptiste, Senior Stylist
Why thin, curly hair needs a different cut brief
Two words get used interchangeably and shouldn't. Fine describes the diameter of a single strand — how thick the individual hair is. Thin describes density — how many hairs are growing on your head. You can have coarse strands at low density, or fine strands at high density.
Most people reading this have both: fine curls, not many of them. And nearly all mainstream curly-hair technique assumes the opposite, because the loudest curl problem in a salon is usually too much hair, not too little.
That assumption produces three techniques that are routine on dense curls and quietly damaging on thin ones. Thinning shears remove hair from the middle of the section — fine on a head with hair to spare, ruinous when the ends are already see-through.
Razor-cutting tapers each strand to a point, which on a fine curl means the last inch has almost no substance and frizzes instead of clumping. And heavy internal layering takes weight out of the mid-lengths, which is exactly the weight a sparse curl was using to hold its shape. None of the three should be anywhere near low-density curls.
There's a second problem that has nothing to do with the stylist. Curls are heavy when wet and a fine strand has almost no structural stiffness, so the roots dry flat under that weight — the scalp shows at the part and the crown while the ends still look full. That imbalance produces the triangle: flat on top, wide at the bottom. The instinct is to attack the wide part and thin the ends.
The fix is the opposite — keep a strong, solid perimeter and build height at the crown so the silhouette rounds out instead of flaring. Length works against you too: the longer the hair, the more the curl pattern is pulled out by its own weight, which is why low-density curls almost always read fuller shorter. The shapes in our fine-hair haircut galleries follow the same logic, and it holds with curl in the equation.
One scope note before the gallery: this page is about cuts, and it's written for curls in the loose-to-defined range. If your pattern is a tight coil, the shrinkage changes the diagnosis entirely — a small amount of fine hair fills a large silhouette, so the routine gets built for hair you don't have.
Short is the most direct answer to low density in curls: less length means less wet weight dragging the roots down, and the curl pattern springs up instead of stretching out. All four of these keep length and shape through the top of the head and stay close at the sides, so the height sits where it reads.
rounded curly pixie with 3b curls left long through the crown and tapered close at the sides, on thin low-density curly hair
1
The Rounded Curly Pixie
Length is kept through the top and crown while the sides taper close, so every curl left on the head is working on height rather than hanging. Cut dry, curl by curl, so the stylist can see where each one actually lands once it springs. On low-density curls this is the shape with the best fullness-per-hair ratio there is.
curly bixie with 3a curls, pixie length at the nape blending into a short bob at the front, on thin low-density curly hair
2
The Curly Bixie
Halfway between a pixie and a bob — short and lifted at the nape, a touch longer through the front so there's still something framing the face. It suits anyone who wants the volume of a short cut without committing to a cropped back, and it's forgiving on a round or heart-shaped face because the front pieces soften the jaw. A good first step if you've had long curls your whole life.
tapered curly crop with tight 3c coils, rounded shape with a soft taper at the nape and temples, on thin low-density curly hair
3
The Tapered Curly Crop
A rounded crop with a gradual taper at the nape and temples, no undercut and no disconnection. Because the taper is achieved by cutting length rather than removing bulk, the shape stays dense the whole way through — which matters when there isn't much density to begin with. Tight coil patterns get the most from this one, since shrinkage does half the volume work for you.
curly shag-crop with 3a curls, short choppy crown layers and a soft fringe, ear-length perimeter, on thin low-density curly hair
4
The Curly Shag-Crop
Short shag layers concentrated at the crown, with an ear-length perimeter left uniform beneath them. Expect a trim every 8–10 weeks — the crown layers are what create the lift, and once they grow into the length the shape flattens fast. Ten minutes of styling on wash day, then two or three days of refreshing with water and your hands.
Curly bobs & lobs with a strong perimeter
The bob family is where most thin curly hair lands, and the reason is the perimeter. A solid bottom line gathers the curls into a defined edge instead of letting them fan out, which reads as density even when there isn't much. The rule across all four: keep the line intact, and put the shaping at the top.
chin-length blunt curly bob with 3a curls and a solid unlayered perimeter, on thin low-density curly hair
5
The Chin-Length Blunt Curly Bob
Ask for it exactly this way: "chin length when dry, solid perimeter, no layers below the ear." That single unbroken line is doing all the work — it stacks the curl ends against each other so the bottom of the shape reads thick rather than wispy. Have your stylist measure to the chin dry, after the curls have sprung, not wet.
jaw-length graduated curly bob with 3b curls, slightly shorter at the nape building height at the back, on thin low-density curly hair
6
The Jaw-Length Graduated Curly Bob
A little graduation at the back — the nape cut shorter than the sides — pushes the curl up and forward, which builds height at the occipital bone where fine curls collapse first. It's the same principle behind a layered bob on fine hair, adapted so the graduation is cut curl by curl rather than in wet sections. Keep the graduation subtle; steep angles on low density expose the shorter layer underneath.
collarbone curly lob with loose 3a curls, strong perimeter and minimal layering, on thin low-density curly hair
7
The Collarbone Curly Lob
The longest length that still reliably holds curl on low density — past the collarbone, wet weight starts winning and the roots go flat. Style it wet-to-dry with a lightweight foam and a diffuser, clipping the crown roots while it dries. If it's reading flat on top by the second wash, that's the length telling you to take an inch off.
curly A-line bob with 3b curls, shorter at the nape and angling longer toward the front, on thin low-density curly hair
8
The Curly A-Line Bob
Where a blunt bob keeps one flat line, the A-line angles longer toward the front, which sends two vertical lines down past the jaw and narrows the whole silhouette. That makes it the better pick if your curls tend to grow out rather than down. The trade-off against the blunt version is upkeep: the angle blurs as it grows, so it needs a shape-up every 6–8 weeks.
Layered and longer curly cuts that avoid the triangle
If you want to keep length, layering has to change jobs. On dense curls, layers remove weight. On thin curls, they exist for one reason only: to lift the top of the head so the silhouette rounds instead of flaring. That means few layers, placed high, over a perimeter left alone.
curly shag with 3a curls, short crown layers creating lift over a shoulder-length solid perimeter, on thin low-density curly hair
9
The Curly Shag with a Lifted Crown
Shag layering concentrated in the top third of the head, with the shoulder-length perimeter untouched underneath. The shag shape on fine hair works the same way — the short pieces are the volume, the long line is the density. On low-density curls the layer count matters more than the layer length: four or five placed pieces, not a full head of them.
rounded layered curly cut with 3b curls forming a circular silhouette, shorter at the crown and full through the sides, on thin low-density curly hair
10
The Rounded Layered Curly Cut
Layers cut to build a circle rather than a triangle: shortest at the crown, gradually longer through the sides, so the widest point of the shape sits at the cheekbone instead of at the ends. Each layer is point-cut into the dry curl at the exact spot where it falls. This is technique-dependent work — worth finding a stylist who cuts curls dry as their default, not as a favor.
shoulder-length curly cut with 3a curls and soft face-framing pieces starting at the cheekbone, on thin low-density curly hair
11
The Shoulder-Length Cut with Face-Framing Curls
Length left at the back with a few shorter pieces around the face, starting at cheekbone level. It suits anyone who isn't ready to lose length but wants the curls to sit forward and frame rather than hang behind the shoulders. Best on looser patterns — on a tight coil the face-framing pieces shrink up dramatically, so they need to be cut long and allowed to spring.
long curly cut with 3b curls, heavy solid perimeter at mid-back and only crown layers, on thin low-density curly hair
12
The Long Curly Cut with a Heavy Perimeter
The compromise for anyone determined to keep real length: a thick, unbroken line at the bottom, no internal layering at all below the ear, and just enough shaping at the crown to stop the top going flat. Be honest with yourself about maintenance — this needs root clipping every wash day and a dusting of the ends every 10–12 weeks, or the perimeter thins out and the triangle comes back.
Curly bangs, fringe & parting tricks
A fringe on thin curly hair borrows density from the front of the head, which is where fine curls are already thinnest — so the successful versions are the ones that stay soft and blend outward rather than sitting as a solid block. The parting matters just as much, and costs nothing. The last entry here is the silhouette to avoid entirely.
curly curtain fringe with 3a curls parting in the middle and sweeping toward the cheekbones, on thin low-density curly hair
13
The Curly Curtain Fringe
Curls parted through the middle and swept out toward the cheekbones — the most forgiving fringe on low density, because it blends into the face-framing instead of demanding a solid line of its own. Style it by shaping each side with your fingers while damp and letting it dry without touching. It grows out into the length rather than into an awkward stage.
cropped curly fringe with 3b curls sitting high on the forehead above the brow, on thin low-density curly hair
14
The Cropped Curly Fringe
Ask for it as "a short curly fringe, cut dry, sitting above the brow once it springs — take the width from the front of my hairline only, not back into the crown." That last clause is the one that protects you: a fringe sectioned too deep steals the crown hair you need for lift. Short and narrow, not deep and heavy.
curly cut worn on a deep side part with 3a curls piled toward one side for crown height, on thin low-density curly hair
15
The Deep Side Part for Curly Crown Lift
Not a cut — a setting, and the cheapest volume in this whole list. Moving the part off-center forces the hair to travel across the top of the head, which lifts the roots at the crown and hides the wide scalp line a center part exposes. Set it while the hair is soaking wet, then leave it alone completely until it's dry.
long one-length curly hair with heavily thinned see-through ends and a flat crown, shown as the shape to avoid, on thin low-density curly hair
16
The Long, One-Length, Thinned-Out Cut — the one to skip
This is the shape most people with thin curls arrive in, and it's worth naming. Length with no crown shaping lets the roots go flat; thinned ends leave the bottom of the silhouette transparent; together they produce the exact triangle everyone is trying to avoid. If that's you, the fix isn't more thinning — it's taking the length up to somewhere between the chin and the collarbone, restoring the perimeter, and putting a few short layers at the crown. Nothing else in this list will help until those ends grow back.
Styling thin curls so they hold volume
The single biggest lever is what you don't put on. Heavy butters, rich creams, and oils are the backbone of most curly routines because dense, coarse curls need that much moisture — a fine curl at low density is flattened by a fraction of it.
Use a lightweight foam or a soft-hold gel instead, apply it to soaking-wet hair rather than damp, and use less than you think. If you're not sure why your curls drink product and still frizz, how porous your hair is usually explains it. And if your pattern is closer to a wave than a curl, the cleansing trade-offs are different — see shampoo for fine wavy hair.
Apply with the "squish to condish" motion — hair dripping wet, cupping handfuls upward toward the scalp so the product and water get pushed into the curl rather than smoothed down it. Then clip the roots: small metal clips at the crown and along the part, lifting the wet hair off the scalp so it dries in a lifted position instead of collapsing under its own weight.
Diffuse on low heat and low speed with your head tipped, hovering rather than moving the dryer around, and finish on the cool setting to set the shape. Leave the clips in until the hair is completely dry, then scrunch out the gel cast with clean hands. The step-by-step version of that, with the distance rule and the reason not to press the bowl against your scalp, is in how to diffuse fine, wavy hair for volume.
Day two is a refresh, not a re-wash. Mist with plain water, re-scrunch, and clip the roots again for ten minutes while you get ready — adding more product on top of yesterday's is what turns fine curls limp by afternoon. If the ends look frizzy rather than flat, that's a moisture problem, not a volume one; our guide to frizz on fine hair covers the fixes that don't add weight.
Chair-side note
If you take one sentence into the salon, make it this: cut it dry, curl by curl. Wet curly hair lies about where it will sit. Every curl stretches by a different amount depending on how tight it is, so a line that looks even wet dries uneven — and on low density you can't afford a correction cut to fix it.
Cutting dry means each curl is cut exactly where it lives. It's slower and most salons price it accordingly, but on thin curls it's the difference between a shape that holds and one you spend three months growing out. If a stylist tells you they only cut curls wet, that's useful information. What you cleanse with sets up everything here — shampoo for fine curly hair covers why co-washing usually backfires at this texture.
SB
— Simone Baptiste, Senior Stylist
What to ask your stylist
Book a curl-specific appointment, arrive with your hair dry and styled the way you normally wear it, and open with the density, not the curl pattern.
Say: "My curls are fine and my density is low — the scalp shows at my part. I'd like this cut dry, curl by curl. Please keep a solid perimeter and don't layer below the ear. I want a few point-cut layers at the crown to lift the top of my head, and no thinning shears or razor anywhere in the cut." Then set the length together: "Measure to my chin once the curls have sprung, not while it's wet."
If they push back on the no-thinning request, have that conversation before the first cut, not after. Ask for your trim interval while you're still in the chair — crown-layered cuts generally need 8–10 weeks, blunt perimeters can stretch to 12.
When these rules bend
Your curls are fine but your density is actually average or high. Then a little weight removal is genuinely useful, and some internal layering will stop the shape reading bulky. Have your stylist assess the scalp at three or four partings before deciding.
Your scalp is visible at the crown or the part is widening. Cut and styling can only do so much once coverage is the real problem — read our guide to coverage for thinning on top before choosing a shape.
You have a very tight coil pattern with heavy shrinkage. Chin-length can dry to ear-length, so the "shorter reads fuller" rule needs recalculating — measure stretched and dry, and add length to compensate. The shapes built around that math are in cuts for fine coily hair.
The change in your hair has been fast, patchy, or came with itching or shedding. That is not a haircut question. See a board-certified dermatologist before you book the salon appointment.
FAQ
The most reliable choice is a chin-to-collarbone curly bob or lob with a solid perimeter, cut dry and curl by curl. Low-density curls read fuller when the bottom line stays intact and the shape is built at the crown rather than removed from the ends. Ask for a small number of point-cut internal layers placed high to lift the top of the head, and no thinning shears or razor anywhere in the cut. If your curl pattern is tight enough that shrinkage pulls a bob above the chin, cut it a little longer and let it spring up.
Shorter, in most cases. Length pulls curl pattern out under its own wet weight, so long low-density curls tend to hang straighter at the root and flare at the ends, which is the triangle silhouette everyone is trying to avoid. Somewhere between the chin and the collarbone is where curls stay springy enough to hold their own volume. Shrinkage varies a lot, though, so measure the length dry with your stylist rather than wet and pick the number that lands where you want it after the curl springs up.
They help, but only if they are placed rather than scattered. On dense curls, layers exist to remove bulk; on low-density curls there is no bulk to remove, so layering for weight removal just leaves the ends see-through. What works is a small number of shorter layers around the crown to lift the top of the head, with the perimeter left solid underneath them. Heavy internal layering through the mid-lengths, and any layer cut with a razor, is what makes thin curly hair look thinner than it is.
Volume on fine curls is mostly a matter of not weighing them down. Apply product to soaking-wet hair, use a lightweight foam or gel rather than a butter or a rich cream, and scrunch out the dried cast at the end. Clip the roots at the crown with small metal clips while you diffuse so the hair dries lifted instead of collapsing under its own wet weight. Diffuse on low heat and low speed with your head tipped, and finish on cool. On day two, mist with water and re-scrunch rather than adding more product.
You can, but you almost certainly should not. Thinning shears and razors are standard on thick, dense curls because the goal there is bulk removal. On low-density curls the same tools take away hair you cannot spare, and they leave short broken pieces that frizz at the surface instead of joining a curl clump. If the shape feels too wide at the bottom, the fix is a shorter overall length or more lift at the crown, not less hair through the ends. Say plainly in the chair that you do not want thinning shears used.
Usually because curls are heavy when wet and the roots dry flat under that weight, so the scalp shows at the part and the crown even when the ends still look full. Root clipping while you diffuse, a deeper or zigzag part, and keeping conditioner off the roots all help. Rotating your part instead of wearing it in the same place stops one line from looking permanently wide. If the scalp is showing more than it used to, or the change came on quickly or in patches, that is worth a doctor's opinion rather than a styling fix.
Eleven years behind the chair, specializing in short shapes and fine-hair texture. Simone checks scalp density at three partings before cutting a curl, because the number of hairs on the head decides the cut far more than the curl pattern does.
Results vary with hair type, density, and growth patterns. This guide is educational and not a substitute for an in-person consultation with a licensed stylist.
Hairstyle images in this guide are AI-generated illustrations, not photos of real clients or results. See our image policy.
Get the good hair intel
One honest, stylist-written guide in your inbox each week. No hype.

 SB
SB